Saturday, May 29, 2010

Bubblegum Cupcakes

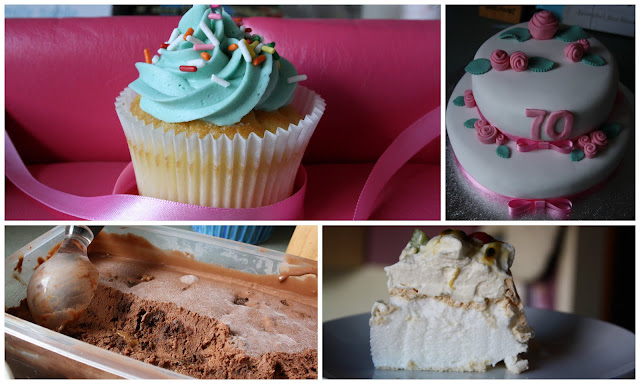
I think there might be a bit of a debate over the colour that bubblegum flavour should be represented with.

I'm a firm believer that bubblegum is a blue kind of flavour. Although, how often do you see bubblegum that's blue?

And then there's the other camp, who believe that bubblegum is best represented by pink.

I kind of like that - pink is pretty, one of my favourite colours, and really it's quite logical as *most* bubblegum is pink.

Anyway, I asked my boyfriend what colour the icing for these cupcakes should be: pink or blue?

He answered blue.

So blue it is!!

Now that I think about it, I wish I had have bought some little bubblegum balls and cut a cone out of the top of the cupcake and put the bubblegum in the middle. That would have been really cool. Next time maybe.

There's also another debate in the cupcake world for me - swirly frosting, or icing that is spread on.

I like both really - there's nothing cuter than a perfectly piped swirl.

But then there's people who don't like lots of frosting piped on the top. They probably prefer the spread frosting.

Which is your favourite??

Recipe via Beantown Baker

2 1/4 cups cake flour (I didn't have cake flour so I made my own - you just measure out your cup of flour, and for each cup you take away 2 tablespoons of the flour and replace it with cornflour. Then sift it. And sift it again. And again and again. And once more just for good measure!!)
1 cup + 2 tablespoons whole milk, at room temperature
6 large egg whites (3/4 cup), at room temperature
2 tsp almond extract (I didn't use this in mine)
1 tsp vanilla extract
1 1/2 cups + 2 tablespoons granulated sugar
4 tsp baking powder
1 tsp table salt
12 Tbsp unsalted butter, softened but still cool

Set oven rack in middle position. Heat oven to 350 degrees.

Pour milk, egg whites, and extracts into 2-cup glass measure, and mix with fork until blended.

Mix cake flour, sugar, baking powder, and salt in bowl of electric mixer at slow speed. Add butter; continue beating at slow speed until mixture resembles moist crumbs, with no powdery streaks remaining.

Add all but 1/2 cup of milk mixture to crumbs and beat at medium speed (or high speed if using handheld mixer) for 1½ minutes. Add remaining ½ cup of milk mixture and beat 30 seconds more. Stop mixer and scrape sides of bowl. Return mixer to medium (or high) speed and beat 20 seconds longer.

Divide batter evenly into prepared pans. Bake until thin skewer or toothpick inserted in the center comes out clean, 15-17 minutes.

Cool completely prior to frosting.

As I've said before, I don't really use recipes for frosting, but here's a rough guide:

200g unsalted butter, softened
400g icing sugar
1/4 cup milk
3 - 4 drops bubblegum flavouring
3 drops blue food colouring

Beat the butter until it's smooth. Slowly add icing sugar and beat until soft & fluffy. Add milk (but don't add it all at once. Remember, you can always add more but you can't take it out!!) flavouring & colour and beat until a smooth consistency and the colour is even.

I wouldn't rely on those measurements I've given - it's just a guess. 

Thursday, May 27, 2010

Chocolate Caramel Brownie Ice Cream

This is the kind of ice cream that you don't want to tell anyone about.

For fear of them wanting some of your precious stash.

For fear of them taking away this beautiful thing from your life.

This ice cream.....is......amazing.

Rich, creamy chocolate ice cream. Chewy caramel brownies. What more could you want out of a bowl of ice cream?

Yummm look at those chunks of brownie!! And the caramel!! Ohhh I want some now. Too bad I made it for a friend - how nice of me!! I did sneak a taste of it though.........couldn't help myself!!

Recipe:

500ml heavy cream
3 tablespoons cocoa
150g bittersweet chocolate chopped(I used whittakers cause it was on special hehe)
1 cup milk
3/4 cup sugar
4 egg yolks
dash of vanilla
1 quantity of dulce de leche brownies

Heat 250ml of the heavy cream in a medium saucepan. Add cocoa and whisk until smooth. Once mixture has come to the boil, take it off the heat and add the chocolate and stir until smooth and there are no lumps of chocolate left.

Transfer your cream & chocolate mixture to a medium size bowl. Using the same saucepan, heat the milk and sugar over medium heat until luke warm. Slowly add this to your egg yolks, whisking whilst adding. You need to make sure you continuously whisk it and that the milk mixture isn't too hot otherwise the eggs will cook!!

Transfer mixture back to your saucepan and heat until thickened. Add this to your chocolate mixture through a fine mesh sieve (just incase any of that egg has cooked.....gross!!) along with your remainig 250mls of cream. Chill over an ice bath in the fridge for at LEAST 4 hours. I chilled mine over night.

When you're ready, churn it according to your ice cream machines instructions and once you've transferred it to a container, break your brownies in to chunks and add them on in!!

It's seriously delicious. I wish I didn't have to give it away!! I'll definitely be making another batch soon.

Wednesday, May 26, 2010

Kitchenaid Icecream Attachment

So, as you know, my boyfriend bought me an ice cream attachment for my kitchenaid.

Unfortunately for me, I have the Australian model kitchenaid, but the American model ice cream attachment.

Cue upset-ness.

I need a converter for the kitchenaid.......unfortunately for me AGAIN, I *think* you have to get the converter from kitchenaid and they won't ship individually to Australia. So.....if anyone knows how I can get my hands on one, of if by some amazing chance there is someone in America reading this little ol blog and would be willing to purchase one and post it to me in Australia (of COURSE I would reimburse you for it) please please PLEASE let me know, and I would be eternally in debt to you :D

I have already made up an ice cream batter which I will have to church in my soft serve maker (very little and very messy!!), I'll post about it during the week :)

THANKS!!

Tuesday, May 25, 2010

Happy 70!!

A couple of weeks ago my mum asked me to make a cake for one of her friends for her 70th birthday. Nothing specific was given - just that the lady doesn't like mud cake.

I hate having to come up with designs when I have no clues at all - because then I worry that the recipient won't like it.

Apparently everyone loved the cake so that's always a good thing. Vanilla cake with strawberry buttercream covered with fondant & fondant roses.

Today, I finally got an ABN (Australian Business No.). I never realised how EASY it is to get an ABN. I had attempted to fill out the online forms several times but got distracted halfway through and didn't do it. Today, I had some down time, filled out the forms, hit submit and BAM!! Instant ABN. So now, for businesses who want to order cakes or cupcakes from me that can't pay me without an ABN (i.e the company my sister works for who quite often have cupcakes for celebrations i.e employee birthdays, farewells, baby congratulations etc) CAN order from me.

YAY!!

Sunday, May 16, 2010

Mars Bar Banana Bread

Nom.

Nom nom nom.

That's the sound of me eating mars bar banana bread.

It's really, really good.

Moist, bananary, caramely, chocolaty goodness.

I've had it bookmarked for a while, and I've also had 3 rather over ripe bananas sitting in the freezer, just begging to be baked with.

See that piece of mars bar sitting in there?? Oh yeahhh that's what I'm talking bout!!

When you take a bite of this bread, every so often you get this little burst of chocolate, and caramel and it really just makes life worth living.

Yum.

Recipe from taste.com.au

Ingredients

  • 150g butter
  • 1/2 cup (100g) brown sugar
  • 2 eggs
  • 2 bananas, mashed (I used 3)
  • 2 cups (300g) self-raising flour
  • 3 x 60g Mars Bars, chopped (I used 3 king size, because there's no such thing as too much - and they were on offer too hehe)
  • 1/2 cup (125ml) milk

Method

  1. Preheat oven to 180°C. Line a 7 x 11 x 21cm loaf pan with non-stick baking paper (I didn't use baking paper, I just greased the tin......should have because a piece of mars bar got stuck to the bottom and left a good chunk of the cake in the tin. Whoops). Beat butter and brown sugar until pale and creamy. Beat in eggs and mashed bananas.
  2. Combine flour and Mars Bars. Fold into the butter mixture with milk. Spoon into pan. Bake for 50-55 minutes. Set aside to cool, then cut and enjoy!! 

Friday, May 14, 2010

Cookie....brownie....bar.....thingys.....

What are these??

Are they a cookie?? A brownie?? Some kind of sweet, deliciously rich and sugary bar??

Apparantly, they're called Congo Bars.

I think I'd prefer to call them a chocolate chip cookie brownie. Or maybe a blondie.

Infact, I think I WILL call them chocolate chip blondies.

Well, that's my name for them, and I'm stickin' to it!!

I had a recipe printed out from something delicious I saw on foodgawker but then Bakerella posted this. I rushed right home from work and picked up some chocolate chips along the way too. Milk chocolate AND white chocolate. Oh boy. I totally regret not going to the gym today.


Yum. Pretty good. Maybe a tad undercooked for some, but I like soft, gooey cookies. That's when they taste best.

Recipe via Bakerella

2 3/4 cup all purpose flour
2 1/2 teaspoons baking powder
1/2 teaspoon salt
2/3 cup butter, softened
1 lb. light brown sugar (Oh my and thank you!)
3 eggs
1 teaspoon vanilla
500g choc chips - I think this is approx what I used......idk, I never measure choc chips - there's no such thing as too many, right?!


Sift flour, baking powder and salt into a large bowl. Set aside.
Stir brown sugar into softened (not melted) butter in another large bowl until butter disappears. You can use the back of your spoon to help incorporate the two together.
Add eggs one at a time to butter mixture and stir well after each egg.
Add vanilla & chocolate chips. Mix well.
Add dry flour mixture and stir until well combined.
Line a 13 x 9 brownie pan and spread mixture evenly in pan.
Bake at 350 degrees for 30 minutes (I baked mine for EXACTLY 30 mins. I probably should have left them in for about 7 - 10 more mins though) or until top is golden brown.

Did you see my cute pink sifter up there?? My brother picked that out all by himself to give to me for my birthday.

And I know that statement makes him sound younger than me but no, he's not my little brother. He's actually 33. But that is a gift that a man of any age should be commended on purchasing. Pretty thoughtful if you ask me!!

Tuesday, May 11, 2010

Dulce De Leche Brownies

I have another confession to make.


I've never made brownies from scratch.

GASP.

I know, right. I've always relied on Betty for my brownies. Infact, I'll tell you a funny story.

About 2 1/2 years ago, I met my current boyfriend. I instantly fell head over heels for him and thought I'd make him some brownies to take over to his house. As soon as he tasted them he was all OMGWTFTHESEAREAMAZING and said "did you make these yourself?" well. I did. I did make them myself. I mixed the box mix. And put them in the oven. I made them myself "Of course I made them myself!!".

As you can see, I failed to tell him that although I made them, they came from a box. I didn't think it was important. I wanted him to think I was the best brownie maker in the world, and that after that, no other woman would compare to me in the brownie making stakes.

Then, about a year and a half later, I was in England and he came across and we went to visit his parents. He promptly tells everyone that I make the best brownies EVER and that I HAVE to bake them. In his house. Uh oh.........his sister happened to save me though - she asked if they were Betty Crocker. And I said yes.

And then my little white lie came undone, everyone laughed, and everything was ok - and of course he didn't leave me for a better brownie maker.

And NOW, about a year and a half after THAT, I've finally made my OWN brownies. That's right, no box mix in sight here!!

And boy are they good. Dulce De Leche Brownies. OMGYUM. I saw the recipe posted at no onion please but it is originally from David Lebovitz. I don't care where it came from, I just care that it came in to my life. Really easy to make too!! Here's the recipe:

INGREDIENTS
115g butter, cut into pieces
170g bittersweet chocolate, finely chopped
25g unsweetened cocoa powder
3 large eggs
200g sugar
1 teaspoon vanilla extract
140g flour
optional: 100 g toasted pecans or walnuts, coarsely chopped (I didn't use these because I firmly believe nuts and chocolate are not a match made in heaven. At all. It's a sin to put them together. Really)
1 can (around 390g) Dulce de leche

1. Preheat the oven to 175C. Prepare 20cm square pan – grease it well, you can use aluminium foil or baking paper for lining.
2.Melt the butter and add the chocolate pieces. Once everything has melted remove from heat and whisk in the cocoa powder until smooth. Add in the eggs one at a time, stir in the sugar, vanilla and then the flour. Mix in the nuts, if using.
3. Scrape half of the batter into the prepared pan. Drop one-third of the Dulce de Leche over the brownie batter, then drag a knife through to swirl it slightly. Spread the remaining brownie batter over, then drop spoonfuls of the remaining Dulce de Leche in dollops over the top of the brownie batter. Use a knife to swirl the Dulce de Leche slightly.
4. Bake for 35 to 45 minutes. Don't be a glutton like me and eat one while it's still hot - you WILL burn your tongue on the caramel hehe.

Yum!!

ALSO while I'm here, look what my boyfriend bought me for my birthday:

Kitchenaid ICE CREAM ATTACHMENT!! Yessss what a great boyfriend. Now I can make another batch of caramel cheesecake ice cream to blog about. I was going to do it last week, but unfortunately we ate it all before we got a photo of it. Whoops!!